

50 Shades of Chocolate
Like most women I'm in love with chocolate, it's my NOT SO SECRET indulgent even when it comes to make-up! Chocolate hues or browns as they're most commonly called are the base shades in my everyday make-up palette, they go with any colour eye or skin tone and they give a warm glow to the skin when used correctly. The con's of browns are dirty, yes dirty, when used wrong they can make you look like you've been rolling around in the garden, but if that's the look you're going for, then I'm not going to judge? Besides, you can't get more organic than earth?
Like most women I'm in love with chocolate, it's my NOT SO SECRET indulgent even when it comes to make-up! Chocolate hues or browns as they're most commonly called are the base shades in my everyday make-up palette, they go with any colour eye or skin tone and they give a warm glow to the skin when used correctly. The con's of browns are dirty, yes dirty, when used wrong they can make you look like you've been rolling around in the garden, but if that's the look you're going for, then I'm not going to judge? Besides, you can't get more organic than earth?
Here's how I use chocolate hues in my everyday make-up look.

1. Creating A Base
Any good make-up application starts with a well looked after base. Your skin is your biggest tool when it comes to make-up, you keep this healthy and you're already half way there to your ideal look. For more on this keep an eye out for my future article about skin care.
Start with tweezing your eyebrows if they need doing. (To find out how click here). Next apply a moisturising lotion fit for your skin type. Even oily skin needs to be moisturised as water based products will dry the face and in return cause your glands to over produce facial oils.
If your face still has some dry areas once the lotion has been absorbed then you either need to apply more or switch your moisturising lotion. Email me for a consultation if you need help finding out what you should be using for your skin type.
My Video Chat (Skype etc.) consultations start at £25/$40p/hr or £10/$16 per email consultation. Payed by Paypal.

2. Highlight & Contour
This is the step where you want to highlight your best features and contour your not so great ones (if you have any?) The process in which you do this will differ slightly from person to person due to their facial shape. Pictured is the base steps for highlighting and contouring your face.
To highlight and contour you can use a skin concealer pallet or even powder. I have used a skin concealer pallet, which is where some of your chocolate hues start to make an appearance.
Apply darker shades of browns along the underside of the apple of your cheeks. down the sides of your nose and the top of your forehead, don't worry if they don't match your skin tone, this is to create a shade and should blend nicely after application. Having a fairly large nose I'd usually add a bit more shading just above the tip and sides of my nose but that's for another time when I show you how to contour to your face shape and features.
You'll now want to highlight down the centre of your nose (this actually helps it look thinner) above and below your eyebrows. The tip of your chin, and your cheek bones with a lighter concealer colour than your skin tone. This also gives something for your foundation to grip to, so it should stay on longer during the day.

3. Blending
To blend all this together you can use a foundation blending brush, your fingers or a blending sponge. Personally I find the sponge blends the best out of all three or your own fingers. Remember to make sure all three are clean before using to blend, this will help prevent breakouts.
To blend all this together you can use a foundation blending brush, your fingers or a blending sponge. Personally I find the sponge blends the best out of all three or your own fingers. Remember to make sure all three are clean before using to blend, this will help prevent breakouts.

4. Foundation Application.
Once you've blended your base it's time to add your foundation. I prefer to use mineral make-up, it's hypo-allergenic and good for your skin. Both dry and oily skins can benefit from mineral make-up as it helps to balance the skin. A good mineral make-up will also cover wrinkles nicely and not cake. I like to use a stippling brush (pictured above) to apply mineral foundation as I find it helps cover the face properly and gives an even application.
Once you've blended your base it's time to add your foundation. I prefer to use mineral make-up, it's hypo-allergenic and good for your skin. Both dry and oily skins can benefit from mineral make-up as it helps to balance the skin. A good mineral make-up will also cover wrinkles nicely and not cake. I like to use a stippling brush (pictured above) to apply mineral foundation as I find it helps cover the face properly and gives an even application.

5. Blush/Bronzer
This is also another step in contouring. Using a bronzer wisely means you can perfect the contouring of your face. Too much and it will make you look dirty or worse, orange! Pictured is one of my favourite bronzer's as it doesn't contain any glitter, something that only really looks good if it's a night out or you're - 16 years old. The best way to apply bronzer is with a contouring brush (also pictured). Bronzer is usually applied in the creases of your cheeks under the cheek bone and around the décolletage. You may also apply it in the areas you used dark concealer when contouring earlier.
As for blush, I didn't use any, I tend not to do so as I suffer from rosacea (reddening of the skin). But applying a little blush to the apples of your cheeks maybe in peach or light pink can add to the glow of this look

 .
.For the eyes you will need a flat angled brush and a rounded eye brush. Your eye palette will have a selection of chocolate browns (far right on my palette) as you can see those are the most used out of my eye palette.

The round eye brush is dipped in a medium chocolate brown and brushed across the bottom lid of the eye. As I have hooded eyes I cover the whole of the lid, when they are open colour is hardly seen unless I have them closed or looking down. I then add a dark brown across the top of my lash line to add some depth and a light brown on the top of the lid being careful not to hit the eyebrow. Underneath my brow I add a very light cream so the brow bone stands out and helps my hooded eyes seem larger. Then a touch of gold in the middle of my lid to make my eye shape appear round instead of almond.
To add a eye liner to the eyes I use my flat angled brush and dip in a dark brown/black powder and gently push into the lash line. On the bottom I cover the outer half of the lash line, you can decide to cover the whole of the lash line if you wish. I don't do this as my eyes sometime's appear smaller. If you have the same problem you can line the bottom water line with a white eye pencil then use your dark liner underneath on the lash line.
I make it a habit to use waterproof mascara as I suffer from dust and pollen allergies, this causes my eyes to water unexpectedly, and usually when I'm out. It's not nice if you're in the middle of a conversation with panda eyes and all the other party can concentrate on is your mascara smudged across your face, or worse your mascara has run into your eye and now it's burning!
For the eye brows I use the flat angled brush and dip in an light ashy colour then follow the natural line of my brows. I like my eye brows to look as natural as possible, but further shaping can be done.

When using dark ashy/chocolate colours like this you may sometimes find that the particles from your powder may have dropped off your brush onto your cheek or under eye area. DO NOT use your fingers to try and get rid of these, you will just smudge them into your skin and give yourself dark under eyes which will make you look tired. If you do happen to smudge them, re-apply some concealer to the under eye area then a dab of powdered foundation to blend and set.
If you haven't smudged it already there is another way to get rid of it. You see the brush above, a lot of women don't know what it's actually used for, it's basically a duster for your face. The fan like shape is swept over your skin and lightly picks up any of those loose hairs/powders without causing them to scratch/smudge on your skin.

7. Lips
Lips should always look hydrated, the best way to do this is make sure they actually ARE hydrated, but sometimes they can still look a little parched. Before I apply any lip colour I always use a dab of Vaseline on my lips. This keeps the lips from drying and creates a smooth base for the lip colour.
Next I line the lips with a Boots NO7 precision lip pencil.
I recently found a beautiful Lip Plumper from Jane Iredale when Talking to a make-up artist at a recent wedding event. This, Just Kissed Lip Plumper in Tokyo is applied to the lips and tingles slightly. Unlike most lip plumper's the tingle does not hurt in any way nor does it distort your lips. I'm not sure it actually plumps at all? It gives a nice youthful and hydrated glow which in turn makes them appear bigger not "plumped".
You can add a little pink/peach powder to the inner parts of your lips to create a shading effect. This also helps the colour stay on your lips longer.

This concludes the look and should leave you appearing natural and fresh.
If you have any questions or would like a consultation please email hollywouldmakeup@gmail.com

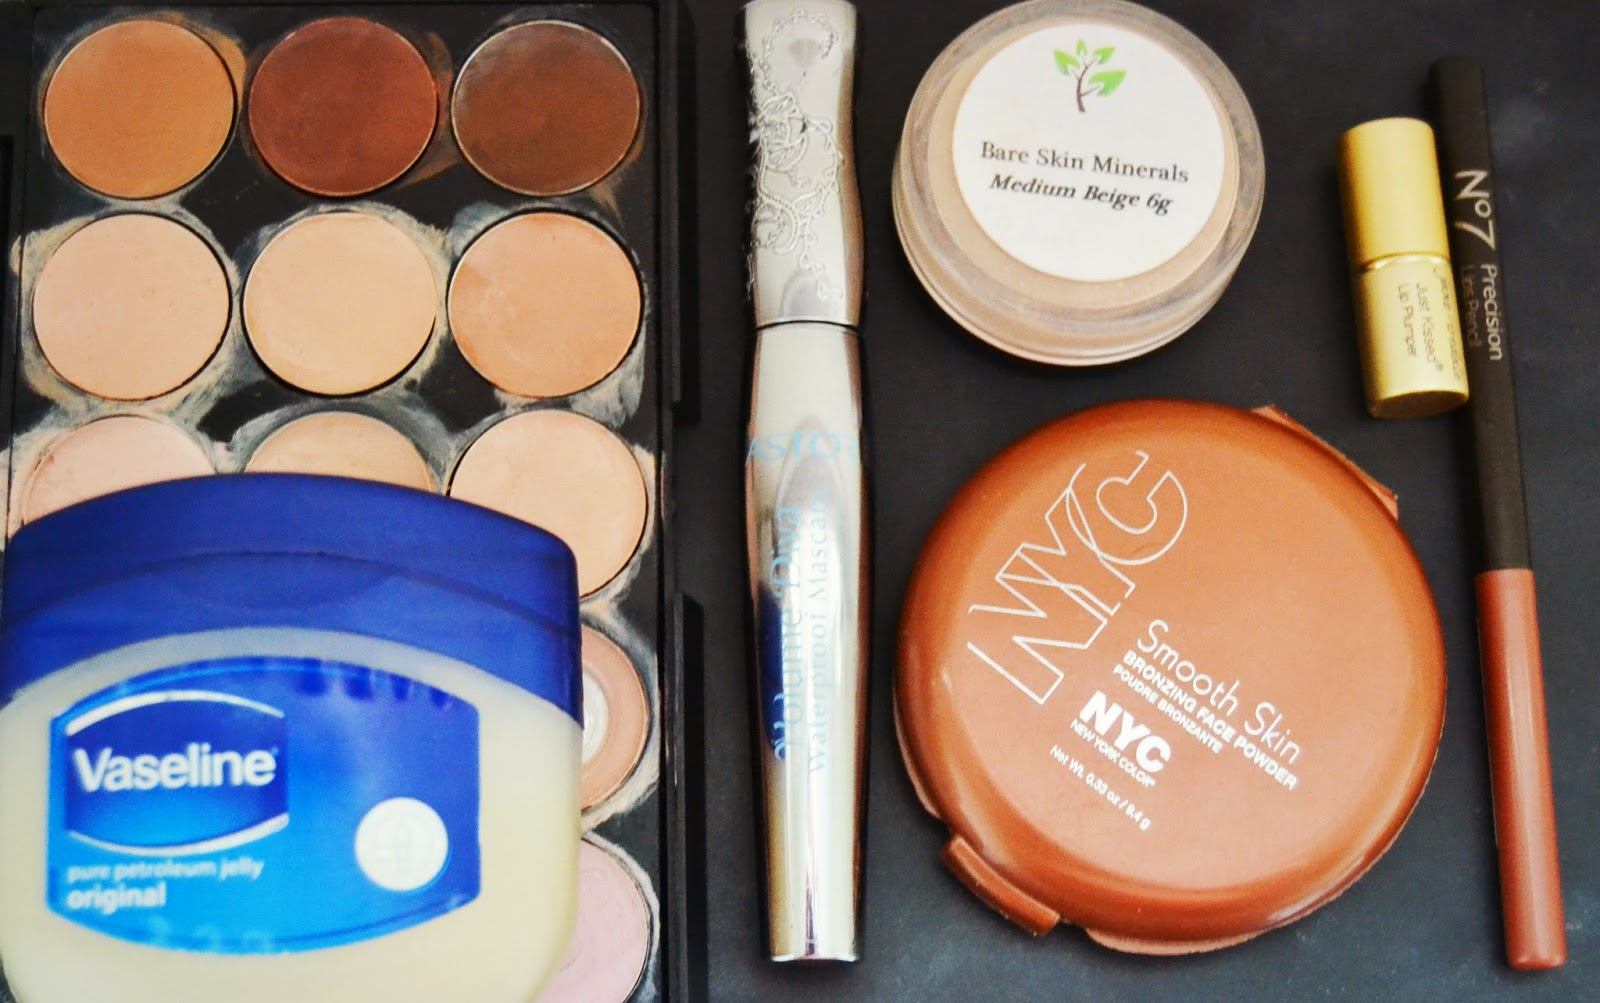
PRODUCTS USED IN THIS TUTORIAL
Beyond Fashion 15 Colour Face Concealer Camouflage Palette Makeup W195
Bare Skin Minerals Foundation - Beige 6g
NYC Smooth Skin - Bronzing Powder
NYC Smooth Skin - Bronzing Powder
66 Colour Eye Palette
Astor Volume Diva Mascara - 7ml Black Waterproof
Astor Volume Diva Mascara - 7ml Black Waterproof
Vaseline Original - Pure Petroleum Jelly
Boots No7 Precision Lip Pencil - Caramel
Jane Iredale Just Kissed Lip Plumper - Tokyo
Coastal Scents 22 piece brush set
Pro Beauty Flawless Makeup Blender Foundation puff multi shape sponges
Jane Iredale Just Kissed Lip Plumper - Tokyo
Coastal Scents 22 piece brush set
Pro Beauty Flawless Makeup Blender Foundation puff multi shape sponges
No comments:
Post a Comment